
In this tutorial we’re going to show you how to build a web server with the ESP32 that controls the shaft’s position of a servo motor using a slider. First, we’ll take a quick look on how to control a servo with the ESP32, and then we’ll build the web server.
Watch the Video Tutorial and Project Demo
This guide is available in video format (watch below) and in written format (continue reading).
Parts Required
For this tutorial we’ll use the following parts:
- ESP32 DOIT DEVKIT V1 Board – read ESP32 Development Boards Review and Comparison
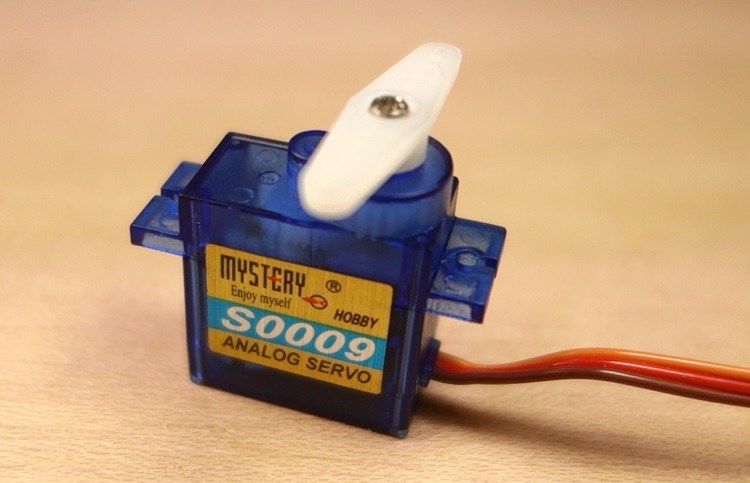
- Micro Servo Motor – S0009 or Servo Motor – S0003
- Jumper wires
Connecting the Servo Motor to the ESP32
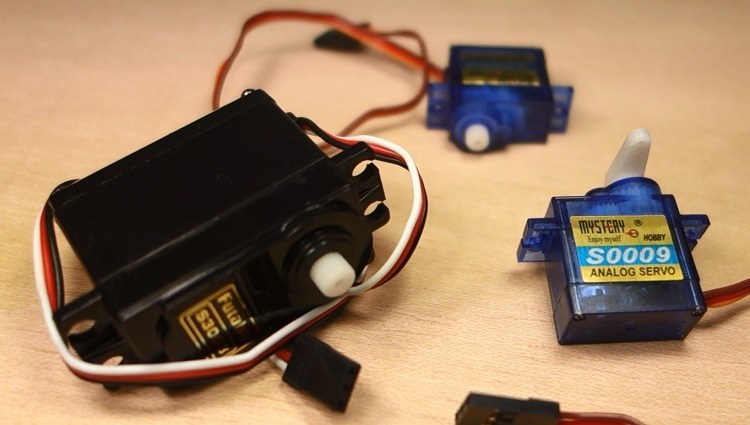
Servo motors have three wires: power, ground, and signal. The power is usually red, the GND is black or brown, and the signal wire is usually yellow, orange, or white.

| Wire | Color |
| Power | Red |
| GND | Black, or brown |
| Signal | Yellow, orange, or white |
When using a small servo like the S0009 as shown in the figure below, you can power it directly from the ESP32.
But if you’re using more than one servo or other type, you’ll probably need to power up your servos using an external power supply.
If you’re using a small servo like the S0009, you need to connect:
- GND -> ESP32 GND pin;
- Power -> ESP32 VIN pin;
- Signal -> GPIO 13 (or any PWM pin).
Note: in this case, you can use any ESP32 GPIO, because any GPIO is able to produce a PWM signal. However, we don’t recommend using GPIOs 9, 10, and 11 that are connected to the integrated SPI flash and are not recommend for other uses.
Recommended reading: ESP32 Pinout Reference: Which GPIO pins should you use?
Schematic
In our examples we’ll connect the signal wire to GPIO 13. So, you can follow the next schematic diagram to wire your servo motor.

(This schematic uses the ESP32 DEVKIT V1 module version with 36 GPIOs – if you’re using another model, please check the pinout for the board you’re using.)
How to Control a Servo Motor?
You can position the servo’s shaft in various angles from 0 to 180º. Servos are controlled using a pulse width modulation (PWM) signal. This means that the PWM signal sent to the motor will determine the shaft’s position.

To control the motor you can simply use the PWM capabilities of the ESP32 by sending a 50Hz signal with the appropriate pulse width. Or you can use a library to make this task much simpler.
Preparing the Arduino IDE
There’s an add-on for the Arduino IDE allows you to program the ESP32 using the Arduino IDE and its programming language. Follow one of the next tutorials to prepare your Arduino IDE to work with the ESP32, if you haven’t already.
- Windows instructions – ESP32 Board in Arduino IDE
- Mac and Linux instructions – ESP32 Board in Arduino IDE
After making sure you have the ESP32 add-on installed, you can continue this tutorial.
Installing the ESP32_Arduino_Servo_Library
The ESP32 Arduino Servo Library makes it easier to control a servo motor with your ESP32, using the Arduino IDE. Follow the next steps to install the library in your Arduino IDE:
github.com/RoboticsBrno/ESP32-Arduino-Servo-Library(opens in a new tab)
- Click here to download the ESP32_Arduino_Servo_Library. You should have a .zip folder in your Downloads folder
- Unzip the .zip folder and you should get ESP32-Arduino-Servo-Library-Master folder
- Rename your folder from
ESP32-Arduino-Servo-Library-Masterto ESP32_Arduino_Servo_Library - Move the ESP32_Arduino_Servo_Library folder to your Arduino IDE installation libraries folder
- Finally, re-open your Arduino IDE
Testing an Example
After installing the library, go to your Arduino IDE. Make sure you have the ESP32 board selected, and then, go to File > Examples > ServoESP32 > Simple Servo.
/*********
 Welcome to Gnd_to_vcc!!
*********/

#include <Servo.h>

Servo myservo;  // create servo object to control a servo
// twelve servo objects can be created on most boards

int pos = 0;    // variable to store the servo position

void setup() {
  myservo.attach(13);  // attaches the servo on pin 13 to the servo object
}

void loop() {
  for (pos = 0; pos <= 180; pos += 1) { // goes from 0 degrees to 180 degrees
    // in steps of 1 degree
    myservo.write(pos);              // tell servo to go to position in variable 'pos'
    delay(15);                       // waits 15ms for the servo to reach the position
  }
  for (pos = 180; pos >= 0; pos -= 1) { // goes from 180 degrees to 0 degrees
    myservo.write(pos);              // tell servo to go to position in variable 'pos'
    delay(15);                       // waits 15ms for the servo to reach the position
  }
}
Understanding the code
This sketch rotates the servo 180 degrees to one side, and 180 degrees to the other. Let’s see how it works.
First, you need to include the Servo library:
#include <Servo.h>
Then, you need to create a servo object. In this case it is called myservo.
Servo myservo;
setup()
In the setup(), you initialize a serial communication for debugging purposes, and attach GPIO 13 to the servo object.
void setup() {
  myservo.attach(13);
}
loop()
In the loop(), we change the motor’s shaft position from 0 to 180 degrees, and then from 180 to 0 degrees. To set the shaft to a particular position, you just need to use the write() method in the servo object. You pass as an argument, an integer number with the position in degrees.
myservo.write(pos);
Testing the Sketch
Upload the code to your ESP32. After uploading the code, you should see the motor’s shaft rotating to one side and then, to the other.

Creating the ESP32 Web Server
Now that you know how to control a servo with the ESP32, let’s create the web server to control it (learn more about building an ESP32 Web Server). The web server we’ll build:
- Contains a slider from 0 to 180, that you can adjust to control the servo’s shaft position;
- The current slider value is automatically updated in the web page, as well as the shaft position, without the need to refresh the web page. For this, we use AJAX to send HTTP requests to the ESP32 on the background;
- Refreshing the web page doesn’t change the slider value, neither the shaft position.

Creating the HTML Page
Let’s start by taking a look at the HTML text the ESP32 needs to send to your browser.
<!DOCTYPE html>
<html>
<head>
  <meta name="viewport" content="width=device-width, initial-scale=1">
  <link rel="icon" href="data:,">
  <style>
    body {
      text-align: center;
      font-family: "Trebuchet MS", Arial;
      margin-left:auto;
      margin-right:auto;
    }
    .slider {
      width: 300px;
    }
  </style>
  https://ajax.googleapis.com/ajax/libs/jquery/3.3.1/jquery.min.js tags. This snippet of the code updates the web page with the current slider position:
var slider = document.getElementById("servoSlider");
    var servoP = document.getElementById("servoPos");
    servoP.innerHTML = slider.value;
    slider.oninput = function() {
      slider.value = this.value;
      servoP.innerHTML = this.value;
    }
And the next lines make an HTTP GET request on the ESP IP address in this specific URL path /?value=[SLIDER_POSITION]&.
$.ajaxSetup({timeout:1000});
function servo(pos) {
  $.get("/?value=" + pos + "&");
}
For example, when the slider is at 0, you make an HTTP GET request on the following URL:
http://192.168.1.135/?value=0&
And when the slider is at 180 degrees, you’ll have something as follows:
http://192.168.1.135/?value=180&
This way, when the ESP32 receives the GET request, it can retrieve the value parameter in the URL and move the servo motor to the right position.
Code
Now, we need to include the previous HTML text in the sketch and rotate the servo accordingly. This next sketch does precisely that.https://tpc.googlesyndication.com/safeframe/1-0-37/html/container.html
Note: as we’ve mentioned previously, you need to have the ESP32 add-on installed in your Arduino IDE. Follow one of the following tutorials to install the ESP32 board in the Arduino IDE, if you haven’t already:
- Windows instructions – ESP32 Board in Arduino IDE
- Mac and Linux instructions – ESP32 Board in Arduino IDE
Copy the following code to your Arduino IDE, but don’t upload it yet. First, we’ll take a quick look on how it works.
/*********
  Welcome to Gnd_to_Vcc!!
*********/

#include <WiFi.h>
#include <Servo.h>

Servo myservo;  // create servo object to control a servo
// twelve servo objects can be created on most boards

// GPIO the servo is attached to
static const int servoPin = 13;

// Replace with your network credentials
const char* ssid     = "REPLACE_WITH_YOUR_SSID";
const char* password = "REPLACE_WITH_YOUR_PASSWORD";

// Set web server port number to 80
WiFiServer server(80);

// Variable to store the HTTP request
String header;

// Decode HTTP GET value
String valueString = String(5);
int pos1 = 0;
int pos2 = 0;

void setup() {
  Serial.begin(115200);

  myservo.attach(servoPin);  // attaches the servo on the servoPin to the servo object

  // Connect to Wi-Fi network with SSID and password
  Serial.print("Connecting to ");
  Serial.println(ssid);
  WiFi.begin(ssid, password);
  while (WiFi.status() != WL_CONNECTED) {
    delay(500);
    Serial.print(".");
  }
  // Print local IP address and start web server
  Serial.println("");
  Serial.println("WiFi connected.");
  Serial.println("IP address: ");
  Serial.println(WiFi.localIP());
  server.begin();
}

void loop(){
  WiFiClient client = server.available();   // Listen for incoming clients

  if (client) {                             // If a new client connects,
    Serial.println("New Client.");          // print a message out in the serial port
    String currentLine = "";                // make a String to hold incoming data from the client
    while (client.connected()) {            // loop while the client's connected
      if (client.available()) {             // if there's bytes to read from the client,
        char c = client.read();             // read a byte, then
        Serial.write(c);                    // print it out the serial monitor
        header += c;
        if (c == '\n') {                    // if the byte is a newline character
          // if the current line is blank, you got two newline characters in a row.
          // that's the end of the client HTTP request, so send a response:
          if (currentLine.length() == 0) {
            // HTTP headers always start with a response code (e.g. HTTP/1.1 200 OK)
            // and a content-type so the client knows what's coming, then a blank line:
            client.println("HTTP/1.1 200 OK");
            client.println("Content-type:text/html");
            client.println("Connection: close");
            client.println();

            // Display the HTML web page
            client.println("<!DOCTYPE html><html>");
            client.println("<head><meta name=\"viewport\" content=\"width=device-width, initial-scale=1\">");
            client.println("<link rel=\"icon\" href=\"data:,\">");
            // CSS to style the on/off buttons
            // Feel free to change the background-color and font-size attributes to fit your preferences
            client.println("<style>body { text-align: center; font-family: \"Trebuchet MS\", Arial; margin-left:auto; margin-right:auto;}");
            client.println(".slider { width: 300px; }</style>");
            client.println("<script src=\"https://ajax.googleapis.com/ajax/libs/jquery/3.3.1/jquery.min.js\"></script>");

            // Web Page
            client.println("</head><body><h1>ESP32 with Servo</h1>");
            client.println("<p>Position: <span id=\"servoPos\"></span></p>");
            client.println("<input type=\"range\" min=\"0\" max=\"180\" class=\"slider\" id=\"servoSlider\" onchange=\"servo(this.value)\" value=\""+valueString+"\"/>");

            client.println("<script>var slider = document.getElementById(\"servoSlider\");");
            client.println("var servoP = document.getElementById(\"servoPos\"); servoP.innerHTML = slider.value;");
            client.println("slider.oninput = function() { slider.value = this.value; servoP.innerHTML = this.value; }");
            client.println("$.ajaxSetup({timeout:1000}); function servo(pos) { ");
            client.println("$.get(\"/?value=\" + pos + \"&\"); {Connection: close};}</script>");

            client.println("</body></html>");

            //GET /?value=180& HTTP/1.1
            if(header.indexOf("GET /?value=")>=0) {
              pos1 = header.indexOf('=');
              pos2 = header.indexOf('&');
              valueString = header.substring(pos1+1, pos2);

              //Rotate the servo
              myservo.write(valueString.toInt());
              Serial.println(valueString);
            }
            // The HTTP response ends with another blank line
            client.println();
            // Break out of the while loop
            break;
          } else { // if you got a newline, then clear currentLine
            currentLine = "";
          }
        } else if (c != '\r') {  // if you got anything else but a carriage return character,
          currentLine += c;      // add it to the end of the currentLine
        }
      }
    }
    // Clear the header variable
    header = "";
    // Close the connection
    client.stop();
    Serial.println("Client disconnected.");
    Serial.println("");
  }
}
https://tpc.googlesyndication.com/safeframe/1-0-37/html/container.html
How the Code Works
First, we include the Servo library, and create a servo object called myservo.
#include <Servo.h>
Servo myservo; // create servo object to control a servo
We also create a variable to hold the GPIO number the servo is connected to. In this case, GPIO 13.
const int servoPin = 13;
Don’t forget that you need to modify the following two lines to include your network credentials.
// Replace with your network credentials const char* ssid = "";
const char* password = "";
Then, create a couple of variables that will be used to extract the slider position from the HTTP request.
// Decode HTTP GET value
String valueString = String(5);
int pos1 = 0;
int pos2 = 0;
setup()
In the setup(), you need to attach the servo to the GPIO it is connected to, with myservo.attach().
myservo.attach(servoPin); // attaches the servo on the servoPin to the servo object
loop()
The first part of the loop() creates the web server and sends the HTML text to display the web page. We use the same method we’ve used in this web server project.
The following part of the code retrieves the slider value from the HTTP request.
//GET /?value=180& HTTP/1.1 if(header.indexOf("GET /?value=")>=0) { pos1 = header.indexOf('='); pos2 = header.indexOf('&'); valueString = header.substring(pos1+1, pos2);
When you move the slider, you make an HTTP request on the following URL, that contains the slider position between the = and & signs.https://tpc.googlesyndication.com/safeframe/1-0-37/html/container.html
http://your-esp-ip-address/?value=[SLIDER_POSITION]&
The slider position value is saved in the valueString variable.
Then, we set the servo to that specific position using myservo.write() with the valueString variable as an argument. The valueString variable is a string, so we need to use the toInt() method to convert it into an integer number – the data type accepted by the write() method.
myservo.write(valueString.toInt());
Testing the Web Server
Now you can upload the code to your ESP32 – make sure you have the right board and COM port selected. Also don’t forget to modify the code to include your network credentials.
After uploading the code, open the Serial Monitor at a baud rate of 115200.

Press the ESP32 “Enable” button to restart the board, and copy the ESP32 IP address that shows up on the Serial Monitor.

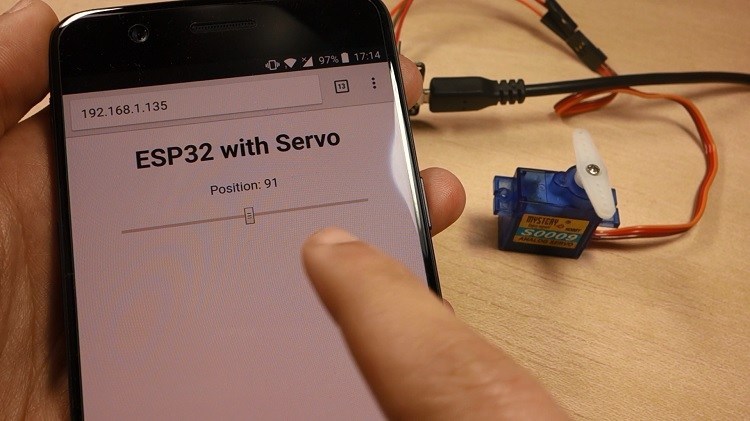
Open your browser, paste the ESP IP address, and you should see the web page you’ve created previously. Move the slider to control the servo motor.
https://tpc.googlesyndication.com/safeframe/1-0-37/html/container.html
In the Serial Monitor, you can also see the HTTP requests you’re sending to the ESP32 when you move the slider.

Experiment with your web server for a while to see if it’s working properly.
Wrapping Up
In summary, in this tutorial you’ve learned how to control a servo motor with the ESP32 and how to create a web server with a slider to control its position.
This is just an example on how to control a servo motor. Instead of a slider, you can use a text input field, several buttons with predefined angles, or any other suitable input fields.

Hiya,
Thank you for these fine tutorial, tested to be running okay on my esp. As i am not a coder, can you help me to add a few buttons control for the servo to do 0,90 and 180 degs turn. Also add forward + and backward – button for fine tuning. I really appreciated you help. Might use this project for my blinds windows etc. cheers.
Shams
LikeLiked by 1 person
Sure we can do that .
Can you provide a complete requirement for your project
You can also ping is on mail or Instagram handle
Mail – gndtovcc@gmail.com
Instagram – gnd_to_vcc
LikeLiked by 1 person